July 06, 2020
1 Comment
After I made the mobile stand and firing shelf for my Caldera kiln the next step was to pull some glass. Here are some notes on my first firing.
I fabricated a cold rolled steel bottom that was 6 x 6 with a 1 and 1/4 inch hole in the center. Next I cut a piece of kiln fiber paper 1/8 inch thick to the size of the steel base. Wear a mask.
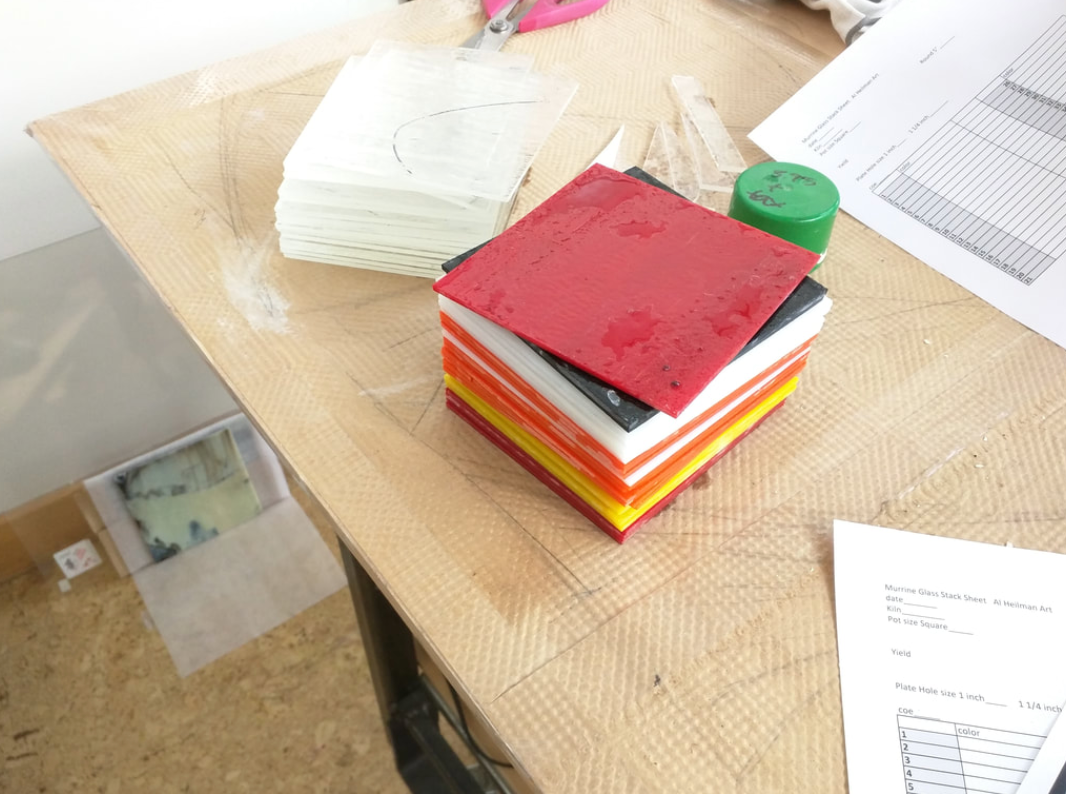
Next I cut 48 sheets of glass 5 x 5 to fit in square stainless steel kiln box
These are available under tools on my webpage


$40.00
5 inch by 5 inch round melting vessel for forming murrine.
Glass melting base Steel 6x6 1 inch hole
$8.00
Glass melting base Steel 6x6 1 inch hole for murrine glass stringers
Glass melting base Steel 6x6 1 1/4 inch hole
$8.00
Glass melting base Steel 6x6 1 1/4 inch hole for murrine pulling
Filled up the fusing box with glass. A Lesson learned.. Measure the first piece of glass cut to make sure it fits into the fusing vessel before you cut them all. Had a joy trimming them all to fit . Lesson learned. Thankful for a flat lap..made it easy to trim smidge off pieces. I recorded the pattern I choose on a log sheet I made on excel. . I recorded the number of sheet and the color used. I only had 2 sheets of black in the entire pot. A little black goes a long way. I have added a link to download the sheet if you need one.


| murrine_glass_log_sheet_sheet1.pdf |
| File Size: |
28 kb |
| File Type: |
pdf |
Download File
1/2 inch Kiln posts placed on the firing shelf. Placed some marks on shelf so that I could center the full box of glass correctly inside the kiln.
Placed the kiln on the shelf and then full firebox of glass on steel shelf into the kiln. Made sure to keep the kiln box away from thermocouple.
Next the lid went on and I fired up the kiln
I used a heavy duty extension cord with 12g wire to plug in the kiln. A must according to Kiln instructions. Keep cord covered with fire blankets to protect it iif glass drops on floor.
Fired the kiln at 300 per hour to to 1250 and then held for 1 hour then afap to 1510 until held there until i was done.
I used carbon fiber and kevlar welding mats to protect the cork floor in my studio from glass falling on floor . Worked perfectly as I had a couple of pieces of glass then hit the floor with no issue. You can see the set up I used with annealing kiln next to caldera. The black blanket protect to 1800 degrees. The kevlar to 1200 degrees.
Next I set up annealing kiln next to calder and programed it to fire afap to 1000 and hold till done pulling murrini then afap to 900 and held for 2 hours. See full schedule below
.


I had a fun and exciting day with friends . Thanks to Elizabeth, Jan, and Bob for sharing in the fun of the first firing. We used a sponge 9 1/2 inch forceps to pull glass and then cut with it from the kiln with a pair of hot glass scissors. Transferred glass to kiln with long needle nosed pliers. Toward the end of the firing we got hollow tubes. Pulled stringers until they got to thin so we turned the kiln off . I am the one with gloves in the pictures.
Some tools I found useful.
the stainless steel bowl I used below the kiln worked well to catch scrap
I used a welding glove to protect my hands
Annealed the cane overnight at 900degrees F (coe90) for 1 hr then 100 per hr to 700 then 200 per hr to 400 the afap to 80 I used round form for holding some futre handles. Figured it works best with 2 people doing this. One to open kiln and one pulling glass. Red glass turns brown when hot. A quick peek at 900 degrees in the annealing kiln.
When it was all done, folded up blankets and rolled the kiln stand into the corner. I Love a kiln on rollers, and the welding blankets which easily folded up for storage.
Net to cut the murrini. I cut big pieces of cane on a tile saw. I used the Ergonomic
Murrini shear I made in an earlier blog for the smaller cane. It worked well for work up to 3/8 inch in diameter. Next step work on making blank for drop out vase... it is available by special order from my website.
I loved the the variety of Murrini designs we got depending on when it came out
.

Cut most of canes 3/4 inch long to so I can piece then together for drop out ring sheets
Notes on my fusing box design ... The box worked fabulous and had no deformation after firing . I broke the glass out of the bottom end of form by covering the bottom of the form with a towel and then gently hammering out the glass. Wear safety glasses! It was interesting that the box shed some small bits of glass for another 24 hours. So keep it covered in the studio. Now the box and base are all ready to reuse. Thru away kiln paper.(Wear a mask)

I will fuse the murrini into a sheet and then will make a drop out vessel for the next blog.
Enjoy and be safe!!! Please like us on you favorite social media!
After this first pull I found the master in murrini Nathan Sandberg. His Video at AEE Glass on murrini are excellent. I highly recommend them.
I would love your feedback. Leave me a comment and I will get back to you. Thank you. To subscribe click on details link at the bottom of this page and a subscription form is available.
Namaste Al
1 Response
Leave a comment
Comments will be approved before showing up.


Michael
January 14, 2025
I have a large annealing oven I use to anneal the sheets of glass I roll for my leaded glass windows but I have never used it to anneal the murini I pull. I lay pulled rods in sequential order, in case I want to color phase, on a ceramic fiber blanket and cover them with another layer. When done, I leave it for 3 or 4 hours until I can handle it. For me, it’s worked fine, never had any rods crack.
I also use a flower pot. One time use of course. No fiber paper and yeah it sticks to the sides and inside bottom but the remainder makes for some interesting glass which I’ll use with my beveling equipment for inclusion into my windows.