July 27, 2017
2 Comments
 As an artist I have spent many years learning to look, listen, and feel in order to create my work. Often, I look at an art work and wonder how in the world did the artist make that? So many times you have to take a course to learn a new process or technique. That can get very expensive when you figure in tuition, travel, lodging, and meals. I also understand that some techniques in art, like enameling, take years to perfect and learn with inherent dangers of a kiln and the enamel dust, so precautions are a must before you venture into a new direction.
Most artists are very helpful and open, but I would encourage all artists to openly share their passion and let people in on the secret. I feel this this would only stimulate more people to take an interest in your art, or to take a course to learn more.
I just finished this bowl for the Enamel Society 2017 auction. I took some process pictures to document my thoughts and challenges of how this bowl came to life. I hope you enjoy the process and my art better. If you have any questions I will try and answer them. Enameling is a process that is part chemistry and sometimes part magic.
I am always curious how artists produce their work. So many times you have to take a course to learn a new process or technique. So, I decided to take some process pictures while making this bowl and share my process and my challenges. I am always up for suggestions....Also a big thank you to 2 people. My mentor, Jan Harrell, a master enamelist whom I have been taking classes with at the Glassell School of Art in Houston for a long time, and Averill Shepps who introduced me to eutectic enamels during a break out session at the last enamel society meeting in Boston. This piece will be a donation the The Enamel Society auction in 2017.
This copper bowl was formed on a Tm technology power hammer . This is what I have in my shop. I took a course with the developer Kent White and a close friend a few years ago and it was fascinating. If you want to learn more visit his web site: https://www.tinmantech.com/ I get no royalties!!! I just love his teaching and tools. Kent is master metalworker in aviation and autos plus a great and fun guy. I bought this because of 2 bad wrists and a bad back. It serves several functions: 1. I am able to use this with my worn out body parts, 2. It saves me a great deal of time, and 3. It gives me the ability to create in so many new ways .
Roughing dies... I used the leather die
Stage 1
Roughing out center with a roughing leather head top and domed bottom head. An ugly hat at this stage. Started with a 12 inch round blank 18 g Cooper.
Stage 2 shrinking dies I used the hard metal die as that was the only one I had
I used the polymer bottom die and large upper planishing dies
Stage 3 Planishing dies smooth things out
All done. No annealing during the entire process. I used a round plastic dowel to make the center impression with the bowl sitting on a steel table. Bowl edges were upset with a planishing hammer and texture was added with fine cross peen hammer Finished size is 12 X 3 inches. It took me 45 minutes to form this bowl using this process. Normally it could take at least 8 to 12 hours if I used a stump with hammers, and with multiple annealings for a bowl this size. Not something my back or wrists could do.
Now onto more excitement and enameling.
Stage 1
Sifted and fired 2015 Thompson 80 mesh thru 100 mesh sifter. The enamel flux coat was applied to both sides after cleaning and polishing with 3M fine wheel and acid wash between sides and polishing. Do not overfire! also may not do a flux coat on inside...my thinking is: it may be less pooling when eutectic reaction occurs.. room to explore.

Sifting enamels and adding 18 g fine silver wire....these are the colors I used.
The eutectic magic happens at 1650 degrees with transparent unleaded Thompson enamel and fine silver wire. I am sure any unleaded enamel may work, but I have only experience with this process and unleaded Thompson enamels. Tried it with leaded enamel and it didn't work well. The eutectic reaction occurs around 1650 degrees. At this temp things move fast and the enamels do too. You have to crack the door of the kiln and watch, or you will have a mess. You never know the result!!!😀 I am fairly abstract in my work. Some may take hours to do sifting of enamels.. but for me I let the magic happen in the kiln. I used 18 g fine silver wire that will fuse into the copper and displace the enamel. 20 g works as well. Here are the colors I used. The image below is what happens when you try this with leaded enamels. Not much flow of the silver.
My shop turns into a mess during this process!
After fired at 1650 for 1 min 45 sec you can see how the silver fused to the copper and displaced the enamel even the flux coat as well. The grey is the fine silver with fire scale. If you keep firing multiple times you can burn thru the silver.

Final firing before acid wash
Bottom of the bowl ....My signature/logo is fired on with a decal, This image was made in illustrator. I then printed with a laser printer on to decal paper. Cut it out and then when wet slid it on. Let it dry, and fired it at 1400 for about 3 minutes. ..The image after the first firing was much darker than the final , but it worked. It will only hold up for a couple of firings. Great technique Jan Harrell! Thanks.

After acid wash, silver is cleaned up and polished. The inside I thought was done. Plan was to add color tomorrow on the bottom . Then I will need to re-polish the fine silver veins.

Bottom with signature. Oh no, I forgot the date!!!!
It seems like there are always surprises or problems that pop up. When I woke up I had several stress fractures in the bottom of the bowl where the enamel pooled during the eutectic firing. So time to solve the challenge. How to protect the silver and clean up the pools of enamel that were now cracking????? A great time to sit back and think.
I recently came across Michael Glancy and amazing artist and who also teaches at RISD. Here is a link to his website. https://michaelglancyglassworks.com/about/ . I spoke to him and learned he uses a 3M sandblasting resist before he sandblasts and then electroforms his glass. So, earlier I had purchased some on amazon as I was interested in pursuing electroforming. It was sitting on the shelf waiting for an application. I applied it to the fine silver areas to protect them and then sandblasted the fractured enamel off with 180 grit aluminum oxide. I then peeled resist off, cleaned it and then refused it .
Buttercut is the common name for this 3M product used in the grave stone making industry. The resist is easily applied as it is peel and stick. It is easy to cut with surgical blade, or cutting printer like a silhouette.

Sandblasting done.Resist peeled off and cleaned with silver protected. Thanks Michael!!!
Before Re-firing after cleaning
When I fire big work I wire the rack to a mesh base so nothing slips getting it to hot kiln. It makes it easier to keep things from falling. Yes, I have done that! Experience teaches.
Fired at 1450 for opaques 3 minutes. Time started when vessel is to temp in kiln.
I needed to keep bowl flat so used weight on bottom while still hot on my steel table.

The colors I used for the bottom.
Now for superb Pictures... Art and product photography is part of my studio.
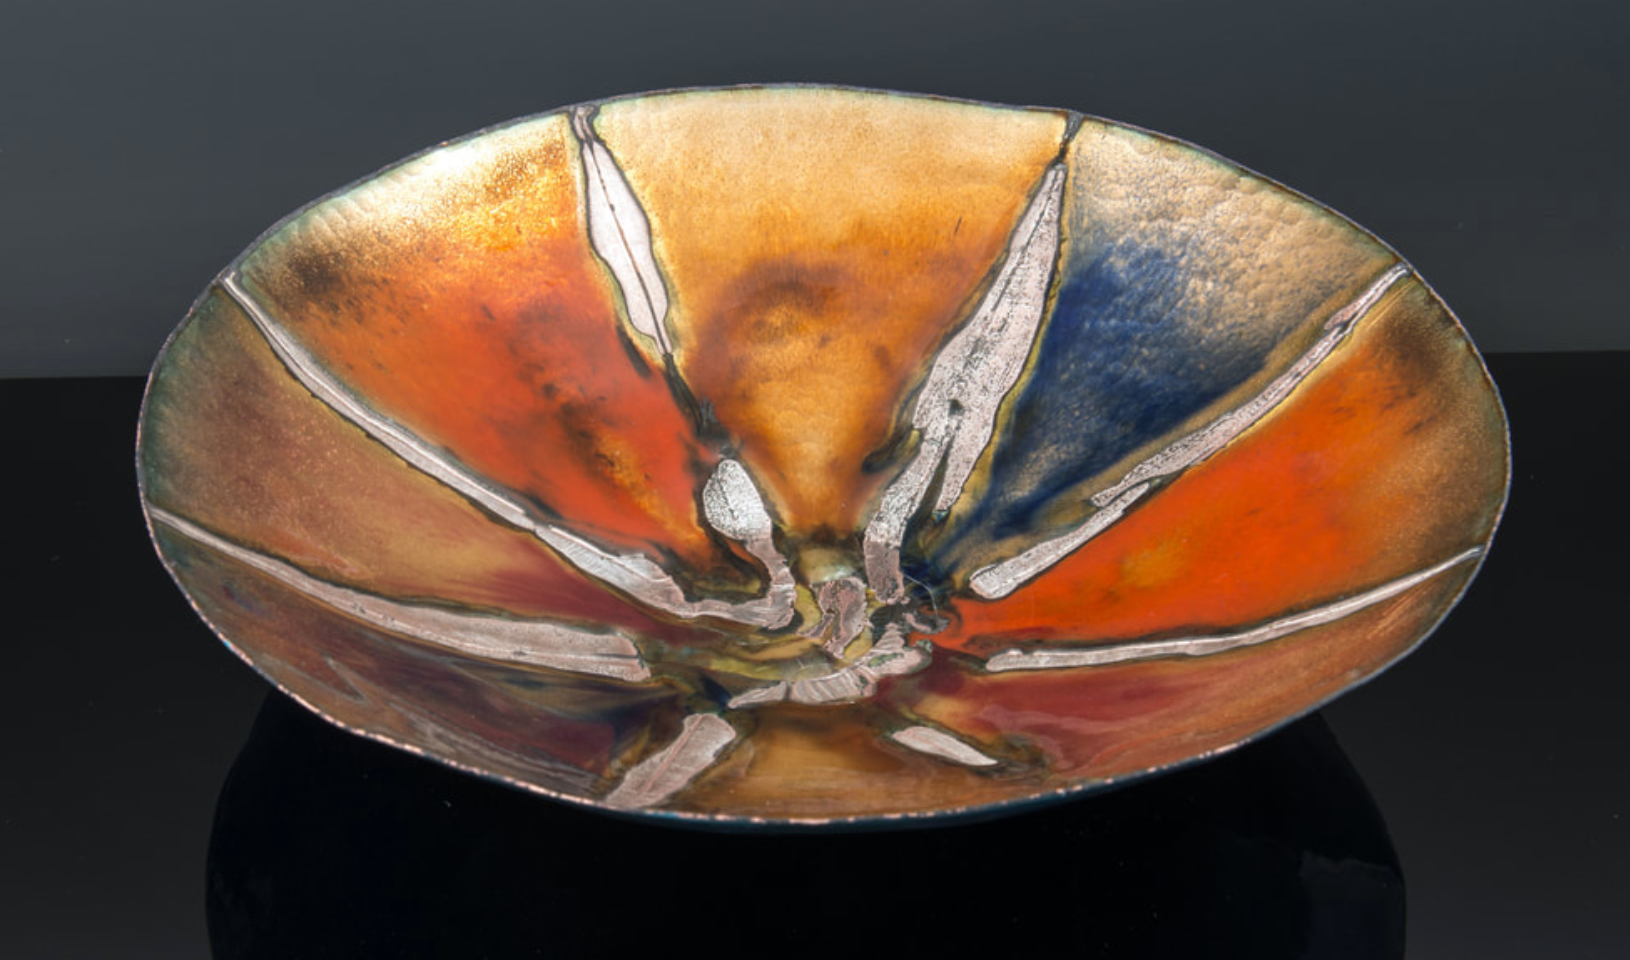
Finally done here are several views. A fun donation and project ... always with surprises and learning!!!
I like the end result. I live on a lake and the colors I used reflect my my love of nature, fire and light. I also like the abstract interplay of the silver and the enamels. It is always a surprise to see how it turns out in the end. The blue/sapphire bottom seems to add life and a surprise.
Bottom of bowl with logo, signature and date. I hope you enjoyed this explanation. If you have questions/suggestions let me know.
Namaste Al
website: www.alheilman.com
email: alheilmanart@gmail.com
Post Scrip:
So the story goes on.... Woke up and was ready to pack and low and behold a crack and a chip came off the bottom. Oh the joys of enameling! It's always a balance to get the stresses equal. And sometimes stuff happens in the heavens..... So this was not acceptable and needed to be repaired.
You can see the pooled enamel is not in balance. A lesson that is easy to forget, but is of the utmost importance. It was to thick and unbalanced. so I decided to use a diamond wheel on a burr under water to take down the thick pools and refire. The issue with refiring multiple times is the silver will eventually burn out. I had a small amount of that but a little renaissance wax and off to the Auction.
I applied a new decal before the last firing over the old one that had burnt off .. This will be the last firing. A wise friend told me "There is a time to call it good enough....before it starts going south". So true with enameling. Thanks for your time.
I would love your feedback. Leave me a comment and I will get back to you. Thank you. To subscribe click on details link at the bottom of this page and a subscription form is available.Thank you. To subscribe click on details link at the bottom of this page and a subscription form is available.
2 Responses
Leave a comment
Comments will be approved before showing up.
 As an artist I have spent many years learning to look, listen, and feel in order to create my work. Often, I look at an art work and wonder how in the world did the artist make that? So many times you have to take a course to learn a new process or technique. That can get very expensive when you figure in tuition, travel, lodging, and meals. I also understand that some techniques in art, like enameling, take years to perfect and learn with inherent dangers of a kiln and the enamel dust, so precautions are a must before you venture into a new direction.


Julie Lushbough
October 30, 2025
Wonderful outline and pictures! Thank you so much for sharing. I’ve wanted to try eutectic processes and now I may have the courage to do so… tho on a much smaller jewelry scale. Best.