May 01, 2018
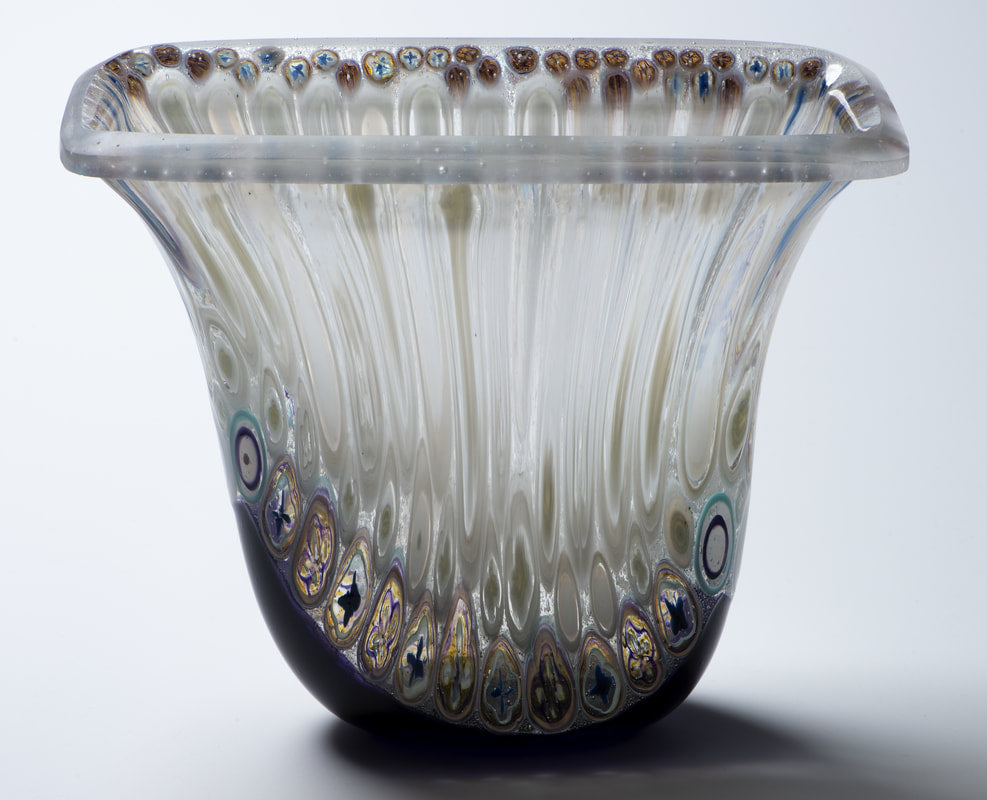
Here is the process I used to make this Drop ring Vessel (Side A)
(Side B)
So this is how I made this vessel.
I started by pulling Murrini from a Caldera Kiln on a stand. (See my blog about making this stand and pulling Murrini)
I collect this info on the back of the sheet to try and keep track of the process.
I use this log sheet to record how I stacked the glass and what temp it fired. You can download it and use it as you wish. Please drop me a note and send me a picture of your results.
I always take a picture of the bottom of the fusing vessel before I break the glass out. It gives me an idea off the colors I will get when I use this murrini in a drop vessel. For this work I used a square vessel that I have available on my website with 1 1/4 inch hole in base plate
I stack the murrini in my kiln in order so I can follow the pull with samples. I make a sample bar that I fuse to clear glass with a contour fuse and number the pull.

The Murrini changes shapes as it is pulled and these pattern bars show how the colors change as well. The numbers relate to the piece pulled.
I fabricate my fusing rings out of stainless steel and they are 7/8 inch wide. You can use mullite strips to hold the shape as well. Some artists use thick fiber paper as a dam. For me the rings allow me to maximize my kiln space, and they are reusable. I have placed bullseye kiln shelf paper in the bottom with the drop shape marked to aide in laying out the patterns. I have placed 1/8 inch fiber paper around sides held in place with elmers glue. Wear a mask when working with fine frits and fiber paper! The Fiber paper can be up to 3/16 shorted than the glass dimension and still work well.

I use fine clear frit between layers of glass and to fill in any gaps. I combined 2 types of murrini to make this vessel.

Next I cut up the desired pieces and I use them to build a blank. With this square blank I used sheet glass with some fine frit to fill out the mold. My murrini was only 3/16 inch thick and was sandwiched between layers of glass. Another option is to use murrini that is cut into 3/4 inch pieces. You get a similar but different result. With the murrini fused to the clear glass I think I get a bigger flow of the murrini in the final work of the murrini. Dealers choice.

Here is my firing schedule that I use with bullseye coe 90. This form is how I record the firing. I use a slow heating at 200 per hour as the blanks are thick and a long slow anneal. They are also tall and close to the heating elements in the top of my kiln. Do not open kiln to look especially during annealing!
A note about my schedules. I have a 24 inch JenKen fiber kiln and they work for it. I heat slow and anneal long. The annealing times come from Bullseye's schedule for thick glass. You need to work out a schedule that works for your kiln.
I have yet to have a slab break or vessel break from failure to heat slowly and anneal long and slow. If you have another idea let me know.
When the Blank is cool I clean up the kiln paper residue with a hepa Vacuum and a mask. Protect your lungs.
Next step is setting up the drop ring and blank.
The view below is looking up at the blank. I use my cell phone to help me align the blank pattern on the drop ring
Now we are lined up and ready to fire for the slump.
Do not fire multiple large banks at the same time. They will slump at different speeds and you cannot control this. If you are firing blanks with like glass (colors) and they are small pieces you may get away with slumping several at a time. When this slump is complete it will drop 8 inches. I have a sheet of kiln fiber paper 1/8th inch on bottom of kiln with a sheet of bullseye shelf paper on top to keep bottom of drop clean and even as it hits kiln.
Do not set this firing schedule and leave. You must watch the drop with a shade 2 or 3 welding glasses when it starts moving around 1250 degrees. The Smaller the vessel the longer it take to drop due to gravity. When it is the shape you wish to accept tell your controller to skip forward in the firing schedule and begin to anneal. When annealing do not open the kiln! You can use the link below to buy them at amazon. Either color is fine.
Next the firing and dropping of the vessel This is my firing log and in my kiln it took 55 minutes to drop. It dropped 2 inches in 5 minutes to finish the drop, so you must be present. I have programed my kiln for 5 hours at this process temp of 1250 but advance it to the anneal temp of 900 when I see the drop complete. Expect that the glass will shift some from one side to the other. That's just the process and it also what I like about this. If you want a reproducible and exact work this is not for you.
Next when the vessel is cool I use a vacuum and a mask to clean up used fiber paper and shelf paper. I can reuse the fiber paper on the drop ring several times if I am gentle with it.
Next is cold working the vessel. A subject of another Blog. Good luck
I would love your feedback. Leave me a comment and I will get back to you. Thank you. To subscribe click on details link at the bottom of this page and a subscription form is available.
Namaste AL
Leave a comment
Comments will be approved before showing up.


 The Murrini changes shapes as it is pulled and these pattern bars show how the colors change as well. The numbers relate to the piece pulled.


